


You’re probably in one of three positions right now. A school principal has a tired play area that no longer serves the students who use mobility aids, a council team has funding pressure and community expectations pulling in different directions, or a planner has been asked for “an inclusive playground” and knows that phrase can mean anything from one token item to a shared space.
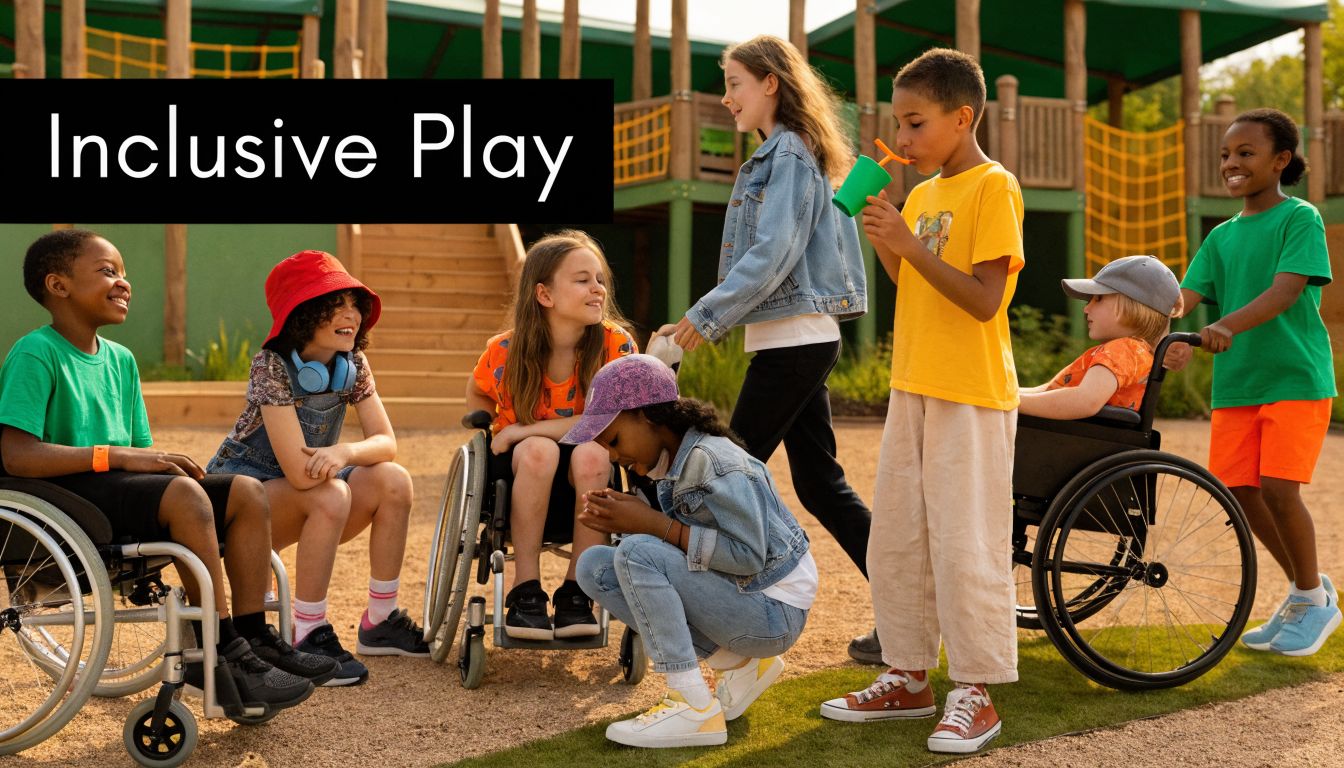
That’s where many projects go wrong. The brief sounds right, the intention is good, but the finished result still separates children instead of bringing them together. A proper playground for disabled children isn’t a special corner, a compliance exercise, or a standard playground with a ramp added at the end. It’s a place designed so children with different bodies, sensory profiles, confidence levels, and support needs can use the same space with dignity.
In practice, that means making better decisions earlier. Layout before equipment. Surfacing before colour palettes. Maintenance before ribbon cutting. Funding strategy before wish lists. In Australia, those decisions also have to hold up under heat, UV, storm events, heavy public use, and the fact that many operators don’t have endless maintenance capacity.
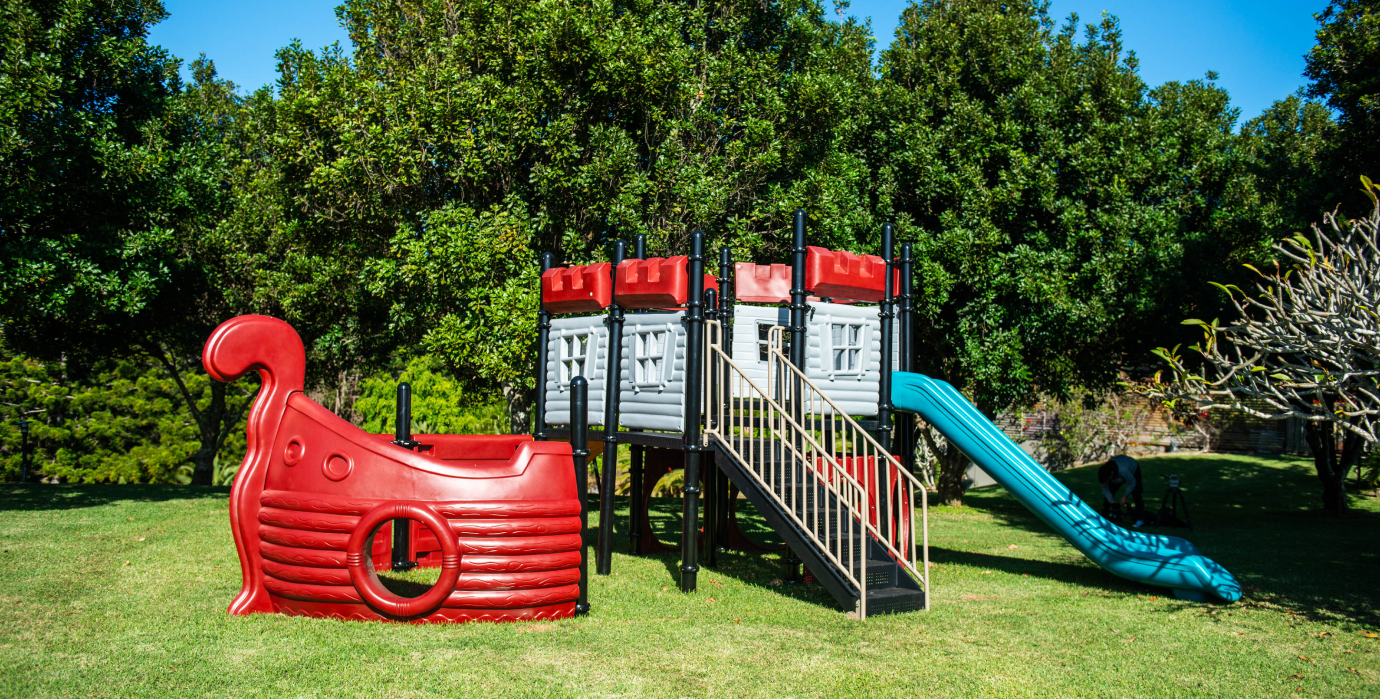
A lot of older playgrounds follow the same pattern. There’s a bark or loose-fill surface, a path that gets you near the structure, a deck only reachable by steps, and one “accessible” item sitting off to the side. Technically, someone may have tried to include everyone. Functionally, one child plays while another watches.
That’s the difference between access and inclusion. Access gets a child to the edge of the experience. Inclusion lets them join it.
A useful way to judge any concept is simple. Does the design help children play with one another, or does it sort them into separate experiences? If you need a practical starting point, Kidzspace’s guide on why inclusive playgrounds matter is a good reference for that shift in thinking.
The strongest inclusive spaces don’t announce themselves with one feature. They work because the whole site has been organised around shared use.
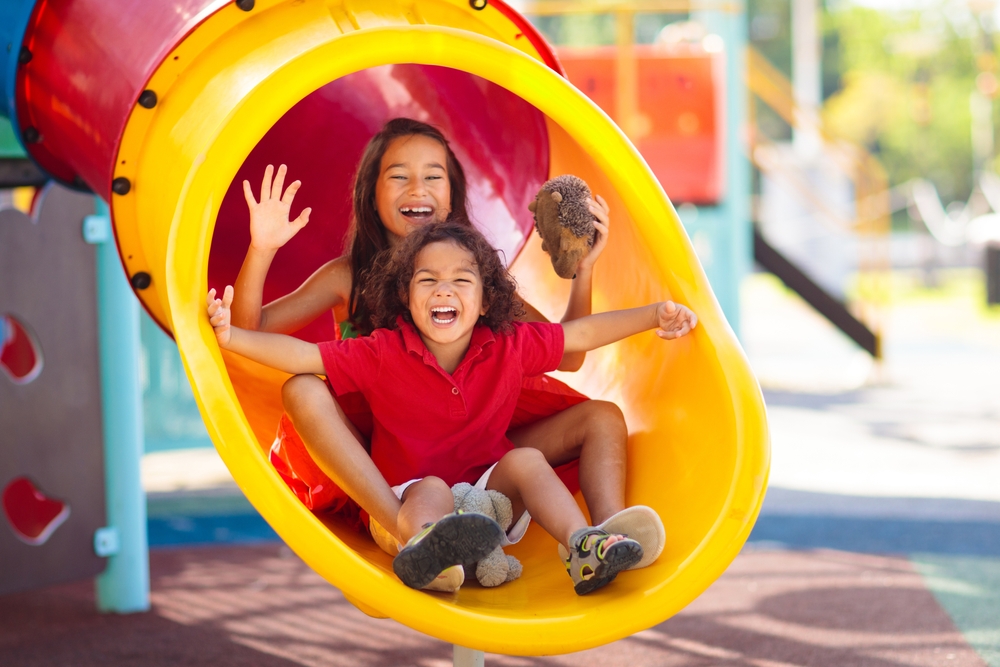
Consider two examples:
The same principle applies everywhere else. A sensory panel isn’t enough if it’s placed where a child can’t comfortably reach it. A wide path isn’t enough if it leads to equipment with no transfer opportunity, no ground-level play, and no space for peers to gather.
Practical rule: If a feature only works for one child at a time and no one else can join them, it may be accessible, but it’s rarely inclusive.
When councils and schools get this right, the result feels natural. Children move through the space without obvious barriers. Carers can supervise without chasing around blind corners. One child seeks movement, another seeks quiet, and both can stay in the same broader play environment.
A practical framework often includes ideas like these:
The best test isn’t whether the spec sheet looks inclusive. It’s whether children stay, return, and use the space together.
That’s why the most successful projects start with a broader brief. Not “install accessible equipment”. Instead, ask better questions. Where will children meet? Where can they pause? What can they do independently? Where can a child reset without leaving the play area altogether? How will a sibling pair use this site at the same time?
A strong inclusive playground doesn’t create a separate experience for disabled children. It creates one community play experience with multiple ways in.
That shift matters because it affects every later decision. Site planning, standards, equipment, surfacing, budget, procurement, and maintenance all become clearer once the project is aiming for belonging rather than a minimum compliance outcome.
The master plan decides whether the playground will work before a single post goes into the ground. If the circulation is poor, the zoning is confused, or the access path is treated as an afterthought, even good equipment won’t rescue the outcome.
For a playground for disabled children, technical compliance and practical usability have to line up. One without the other creates frustration. A design can look polished on paper and still feel exhausting in daily use.
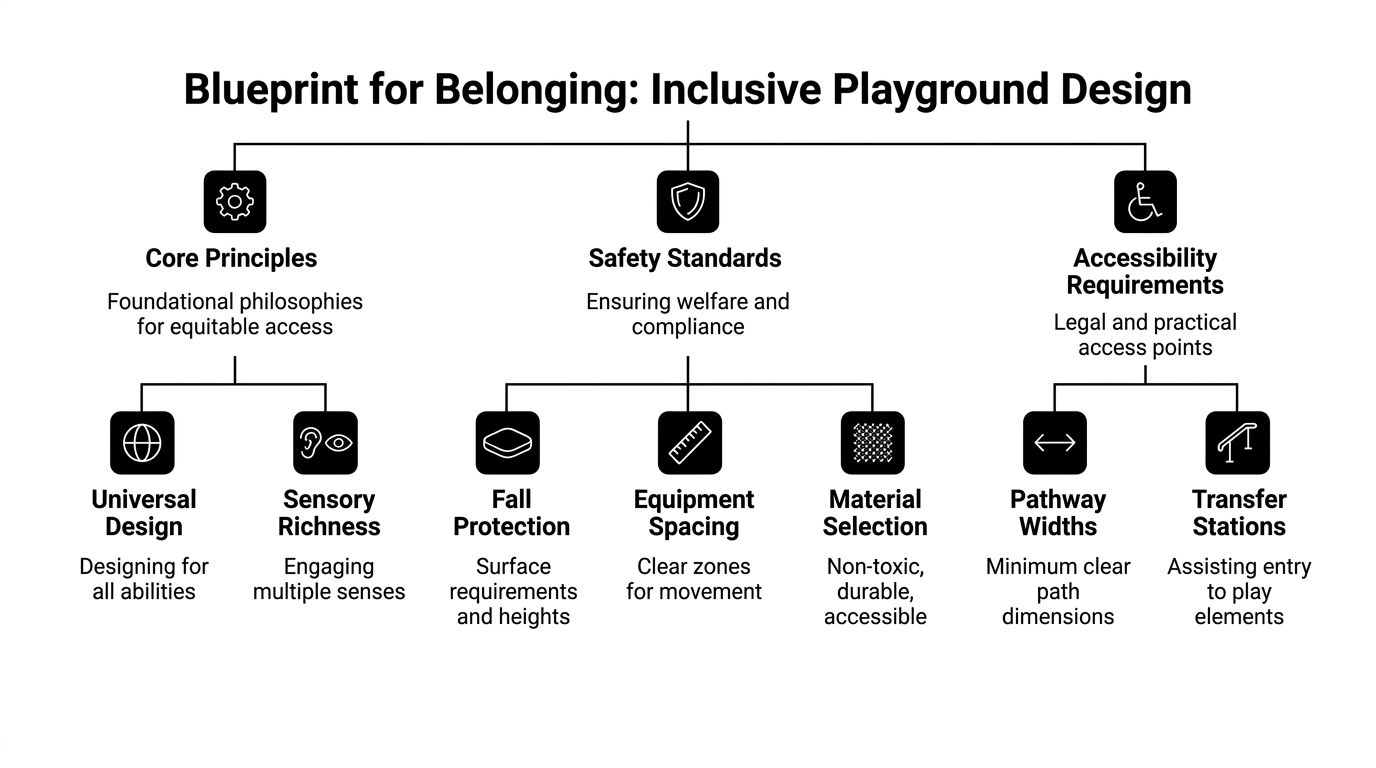
The first thing to solve is how a child enters, moves, pauses, and turns through the space. In Australian projects, that means paying close attention to AS 1428.1:2021. In inclusive playgrounds, accessible pathways must maintain a minimum unobstructed width of 1,000 mm, with passing spaces of 1,800 mm every 20 metres. Post-retrofit benchmarks from Brisbane City Council projects also showed 28% higher play participation rates for children with cerebral palsy when paths exceeded 1,200 mm and used firm, slip-resistant surfaces, as noted in the ASLA universal design playground guide.
That matters because movement isn’t just about arriving at the equipment. Children need room to travel beside peers, pause without blocking others, and approach activities without awkward manoeuvring.
Minimums are a legal and functional baseline. They aren’t always the best design target.
In practice, wider paths often create a better experience because they allow for:
When I review concept plans, one of the first red flags is a path that technically gets somewhere but doesn’t support how children use a playground. If children have to reverse out, wait awkwardly, or detour around others, the path is compliant in form and weak in function.
Inclusive design isn’t one mood. Good sites include intensity changes.
A practical layout usually benefits from three broad zones:
| Zone | What it supports | Common features |
|---|---|---|
| Active zone | Movement, challenge, social energy | Swings, spinners, climbers, slides |
| Sensory zone | Exploration through touch, sound, sight | Musical play, tactile panels, sand or water interaction where appropriate |
| Quiet zone | Regulation, retreat, low-stimulation use | Nooks, seating pods, shaded edges, small cubbies |
This isn’t about segregating children by diagnosis. It’s about recognising that many children move between states during play. A child may spend ten minutes on active equipment, then need a lower-intensity space before rejoining group play.
The strongest layouts let a child regulate without leaving the social life of the playground.
Caregivers need clear sightlines. Teachers need to monitor groups. Councils need spaces that feel safe and intuitive. Those needs all point to the same planning choice. Avoid hidden corners, overly dense structure clusters, and routes that force adults to take long detours.
That doesn’t mean flattening the site into something dull. It means using topography, planting, and equipment placement with intent. A mound can create interest. A sensory garden can soften the edge of a play space. A shaded quiet nook can feel protective without becoming visually disconnected.
AS 4685 affects how equipment and surfacing are selected, spaced, and certified. For clients, the important point is this: safety standards are not just paperwork for the handover file. They shape whether equipment can be reached, transferred onto, used repeatedly, and maintained without constant closures.
Use standards as design inputs, not end-of-project checks.
A sound briefing process should cover:
Some issues show up again and again in early concepts:
A successful inclusive playground starts with a layout that removes friction. Once that’s right, equipment choices become much easier because they’re being placed into a site that already supports belonging.
Equipment selection is where many projects get distracted. Teams often start with catalogue pages, standout pieces, or requests for a certain theme. Those things matter, but they should come after one question: what kinds of play does this site need to support for the children who’ll use it every week?
The best equipment schedules mix physical, sensory, social, and retreat experiences. If one category dominates, the space usually serves some children well and others poorly.
A balanced inclusive playground usually includes several play types, not one “accessible range”.
Physical play builds movement confidence. Look for broad ramps where appropriate, transfer stations, low-gradient entries, supportive swings, accessible carousels, and low-rise climbing that offers challenge without assuming every child climbs the same way.
Sensory play
Musical panels, tactile walls, activity boards, textured routes, and accessible sand or water interaction can all work well. The key is placement. Sensory elements do better when they’re integrated into circulation or social nodes instead of hidden on the perimeter.
Social play
Some of the most valuable items aren’t the tallest or most complex. Multi-user spinners, face-to-face play counters, cubbies with room for more than one child, dramatic play elements, and cooperative equipment support shared use.
Quiet and retreat play
Many briefs are still thin in this area. A child may need to stay close to peers while stepping out of noise or motion. Small nooks, shaded pods, semi-enclosed seating, and lower-intensity sensory features are often the difference between a short visit and a successful one.
Don’t judge equipment only by whether a child can reach it. Judge it by whether they can use it with choice, comfort, and social connection.
Some common buying mistakes are easy to avoid once you know what to look for.
One practical option in the market is a custom system provider such as Kidzspace’s playground surfacing and planning guidance, which can help teams align equipment choices with access routes, surface transitions, and theme requirements. That’s particularly useful when a school or council wants a themed site without losing day-to-day usability.
Surfacing affects accessibility, safety, maintenance workload, and how long the playground remains functional after bad weather. It should be decided early, with operations staff involved.
Below is a practical comparison framework. Upfront cost varies by site, region, specification, and sub-base conditions, so qualitative comparison is more reliable than generic square-metre pricing when exact project pricing hasn’t been quoted.
| Surface Type | Upfront Cost (per sqm) | Wheelchair Accessibility | Impact Attenuation (Safety) | Maintenance Needs |
|---|---|---|---|---|
| Poured-in-place rubber | Higher relative upfront cost | Strong when well installed and continuous | Strong for certified fall zones when correctly specified | Moderate. Needs inspection for wear, joins, and weathering |
| Rubber tiles | Moderate to higher relative upfront cost | Good if levels and joins remain even | Good when product and installation match fall height needs | Moderate. Watch edge lift, movement, and trip points |
| Engineered wood fibre | Lower relative upfront cost | Weaker than unitary surfaces, especially after displacement or wet weather | Can perform well when depth is maintained | Higher. Requires topping up, levelling, and containment attention |
| Synthetic turf with suitable underlay | Moderate relative upfront cost | Can be good if dense, firm, and detailed well at edges | Depends heavily on system design and underlay | Moderate. Needs grooming, infill management, and edge checks |
Instead of asking which surface is “best”, ask which one fits the site’s operating reality.
Choose a unitary surface when wheelchair circulation is central, transitions need to be smooth, and the site has strong public use or school-based daily traffic.
Choose loose-fill cautiously when the maintenance team is small or when access consistency matters. It can suit some projects, but only where ongoing upkeep is realistic.
Assess heat and drainage thoroughly. A surface that works in one region may create comfort or maintenance issues in another.
Review the entire route. An accessible fall zone with an inaccessible connection path still creates a poor user experience.
The right equipment and surface package doesn’t just satisfy a brief. It creates a site that children can return to again and again without needing constant workaround from adults.
Budget conversations usually start too late and too narrowly. Teams focus on the equipment price, then get surprised by civil works, access upgrades, surfacing, shade, certification, drainage, demolition, and installation constraints. For an inclusive playground, that’s risky because the very items that make the space usable are often the ones value-engineered out first.
A stronger approach is to build the business case around whole-of-project value and whole-of-life value.
For Australian mid-sized sites, installation costs for inclusive playgrounds average AUD $500,000 to $1.2M, with a 30% premium over standard builds. Federal grants through the Building Inclusive Communities program have allocated AUD $50M, and modular upgrades costing AUD $50K to $200K have increased usage by 85% in NSW council pilots without requiring a full rebuild, as set out in the verified project data provided for this brief.
Those figures matter for one reason. They show that the decision isn’t only between “do nothing” and “rebuild everything”. There’s a middle path for many sites.
The better option depends on the site.
A full rebuild usually makes sense when the circulation, drainage, surfacing, and equipment layout are all entirely dated. If the bones of the playground are wrong, replacing one or two items won’t fix the underlying exclusion.
A staged or modular approach often works when the site already has useful structure, enough room to improve circulation, and a client who needs visible gains within a tighter budget window.
A sensible staged plan might prioritise:
The strongest approval papers don’t present inclusion as a “nice to have”. They show how the project reduces future friction and lifts everyday value.
Your ROI argument should connect the playground to outcomes like:
A cheaper project that excludes users or requires early rework isn’t the low-cost option. It’s the deferred-cost option.
This is also where many councils and schools miss opportunities. They write grant applications around equipment lists instead of outcomes. Funders usually respond better when the application explains who is excluded now, how the design changes daily use, what stages can be delivered, and how the site will be maintained after completion.
Grant funding helps, but it rarely removes the need for internal planning. Applications often fail because the project scope is vague, the matching contribution isn’t resolved, or the maintenance commitment isn’t clear enough.
A practical funding stack often combines several sources:
For grant preparation, Kidzspace has a useful resource on how to secure playground funding and grants.
A project isn’t affordable if the operator can’t look after it. Include inspections, cleaning, replacement parts, flood recovery risk, and surface upkeep in the financial discussion from the beginning. That’s where many “approved” projects become difficult assets later.
The most credible budgets aren’t just accurate. They show decision-makers that the team understands delivery, ownership, and long-term public value.
A playground opening day can hide a lot of future problems. Fresh surfacing, clean powder coating, and new signage always look good. The true test comes later, after heat, rain, mud, UV, daily traffic, and years of school bags, scooters, prams, and wheelchairs passing through.
That’s why procurement and maintenance need to be treated as part of the design process, not as administrative tasks after the concept is approved.
A weak tender invites weak outcomes. If the brief only asks for inclusive play equipment at a target budget, suppliers can technically respond without proving that the site will perform well over time.
A stronger procurement brief should ask for:
Inclusive features often fail at the connection points. This failure occurs not with the big structure itself, but with the joins, thresholds, hardware, wet-sensory components, and moving parts that are used constantly.
Procurement teams should press suppliers on practical ownership issues, not just appearance.
Ask direct questions such as:
The answers tell you whether the supplier understands public-use reality or is merely selling a layout.
Owner’s lens: The cheapest quote often assumes the cheapest future for maintenance, replacement, and downtime. Public assets rarely behave that way.
Only 15% of Australian public playgrounds have maintenance plans covering disability features, despite a 30% failure rate in wet-sensory zones within two years. The 2025 AS 4685 update mandates 15-year warranties for inclusive gear, in response to events such as the 2024 QLD floods, which damaged 40% of playgrounds. Councils report equipment failure as a top barrier to upgrades in 60% of cases, according to the verified data provided for this article.
Those figures point to a pattern. Operators are still under-planning for lifecycle management, especially where water play, ramps, unitary surfacing, moving inclusive elements, and climate exposure intersect.
A good maintenance plan is specific. It shouldn’t be a generic note saying the site will be inspected regularly.
Include practical tasks such as:
This short video is useful for teams thinking about safe long-term operation and on-site conditions.
Some specifications reduce problems before they start. Corrosion-resistant metals, simpler fixing details, durable wet-area design, and fewer awkward transitions all help. So does resisting the urge to overcomplicate a site with too many special parts that are hard to replace.
The best maintenance strategy starts in design and continues through procurement, handover, and operations. If the site team doesn’t know what needs checking, when it needs checking, and what failure looks like, the playground will gradually become less inclusive even if the original design was strong.
The clearest way to move this project forward is to break it into decisions you can act on now. Whether you’re running a school upgrade, a municipal park renewal, or a new community development, the process becomes manageable once each phase has a clear owner.
A successful playground for disabled children doesn’t happen because one product was selected well. It happens because the whole project was managed with care, from concept through ownership.
If you’re planning an inclusive school or council play space and want practical advice on layout, budgeting, equipment selection, or long-term maintenance, talk to Kidzspace. A no-obligation consultation can help you clarify scope, avoid costly design mistakes, and shape a playground that works in real Australian conditions.


Copyright © Kidzspace. All Rights Reserved.
Copyright © Kidzspace. All Rights Reserved.